How to Install a Push Back Chair Mechanism Without Misalignment or Premature Wear
A push back chair mechanism that binds after three months, or one that develops a lateral wobble your customer notices on first use — that's a warranty claim, a return shipment, and a conversation you don't want to have. The mechanism itself is rarely the problem. The installation is.
We've shipped push back mechanisms to assembly operations across North America, Europe, and the Middle East. The failure patterns we hear about almost always trace back to the same four or five installation errors: mounting holes that weren't checked before assembly, fasteners run in without sequence, pivot points loaded before the mechanism is fully seated. None of these are complicated problems. They're just easy to skip when you're running a production line at pace.
This guide covers the full installation sequence — pre-checks, mounting, alignment verification, and the wear-prevention steps that most assembly instructions leave out.
What goes wrong when installation is rushed
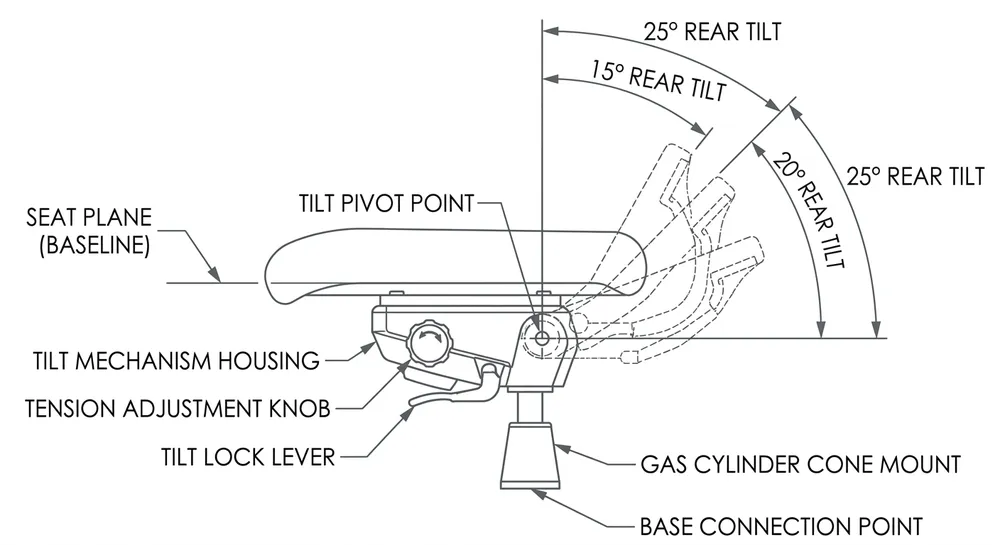
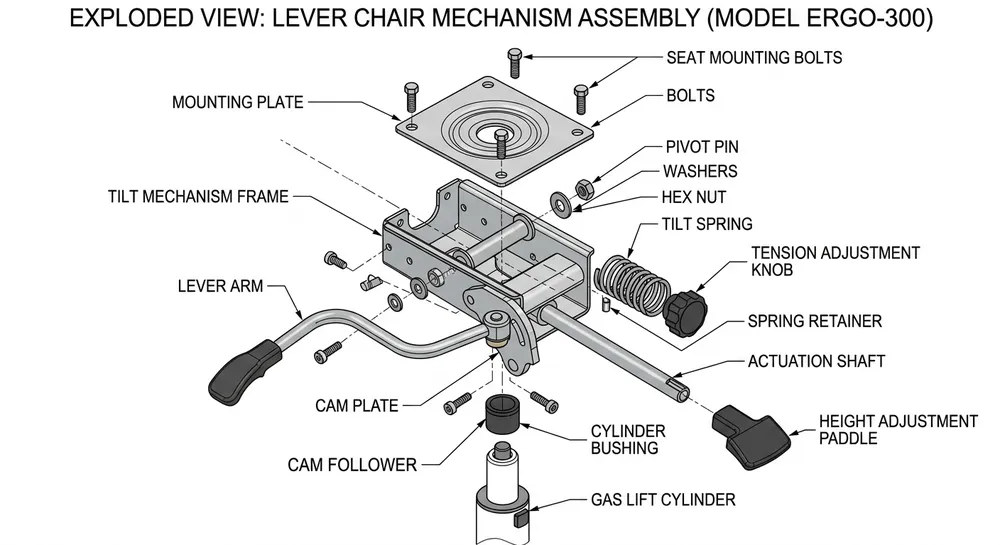
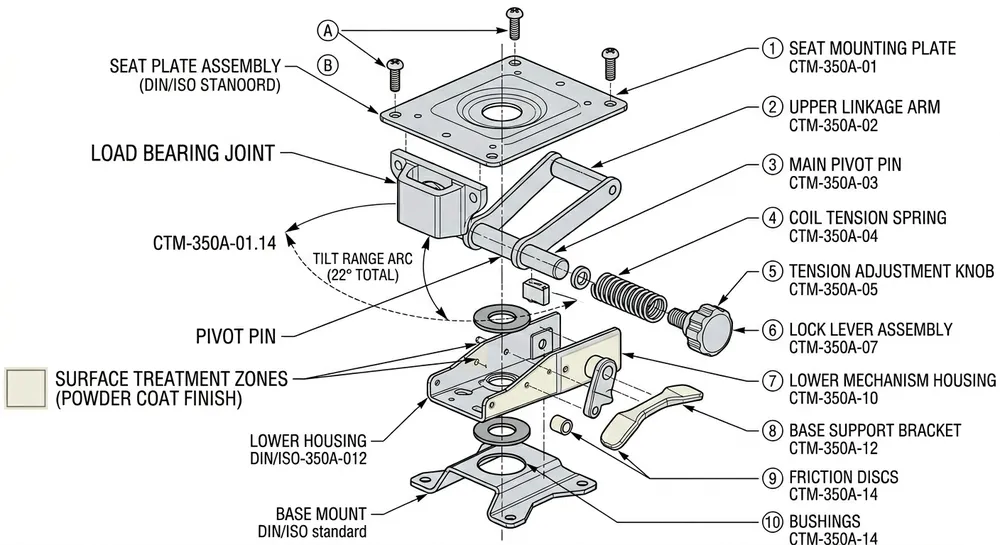
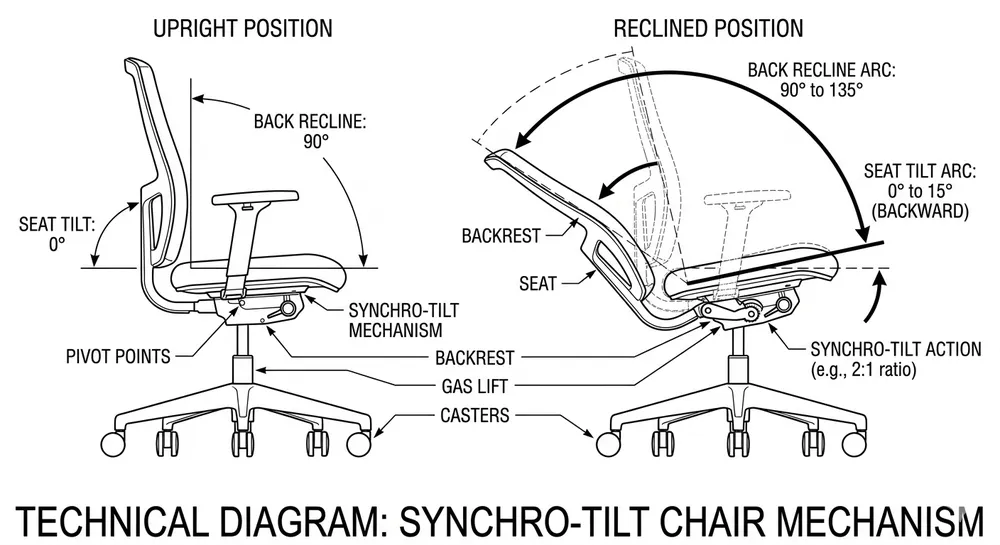
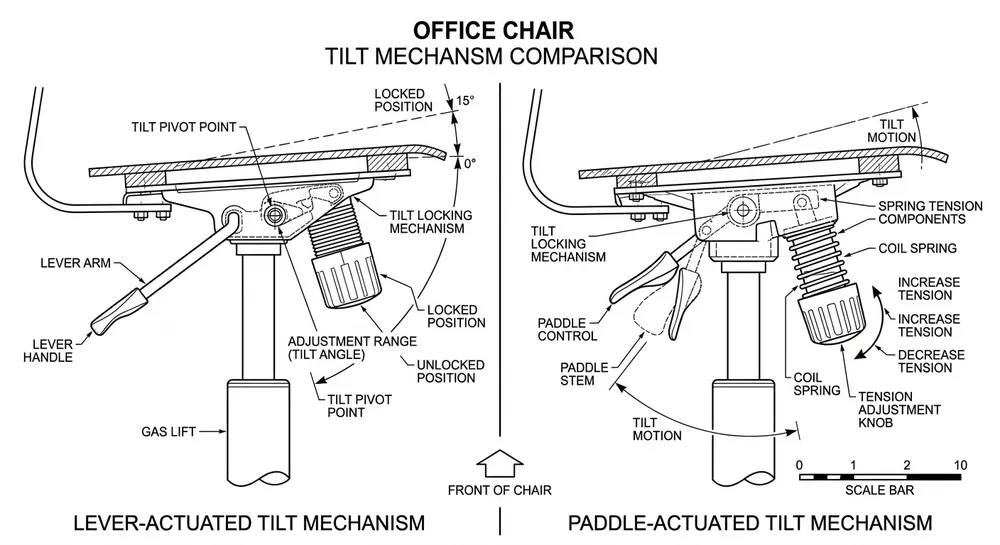
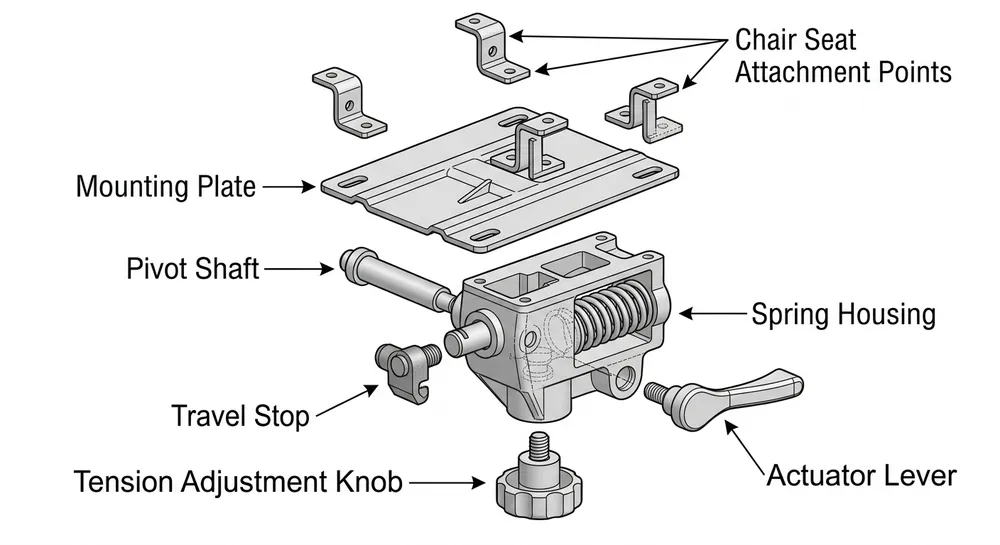
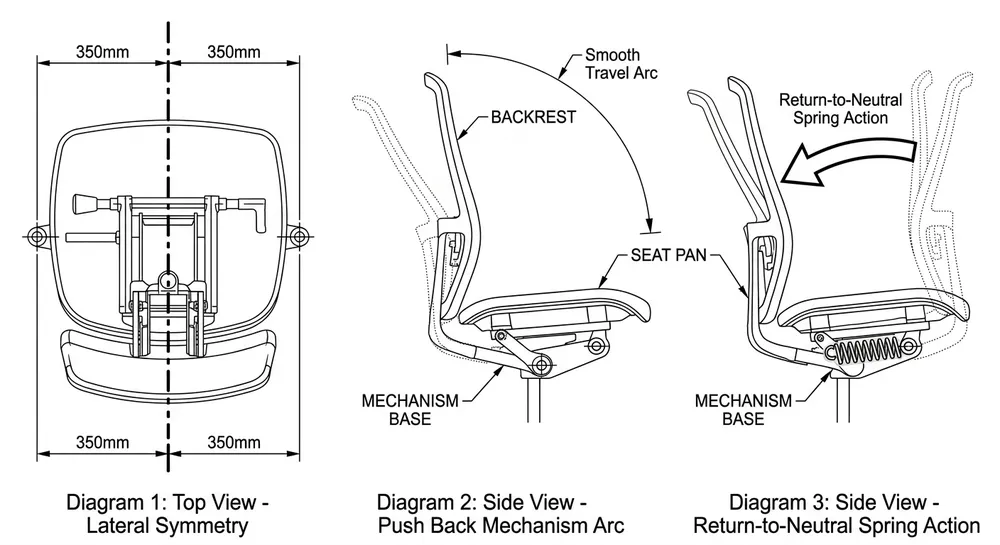
The push back mechanism works on a simple principle: the seat and back move together in a rearward arc around a fixed pivot point under the seat pan. That pivot carries the full dynamic load every time someone leans back. If the mounting plate isn't flat against the seat pan, or if the pivot shaft isn't perpendicular to the direction of travel, that load distributes unevenly across the bearing surface.
Uneven load on the pivot means accelerated wear on one side. Within a few thousand cycles, you get lateral play. The chair starts to feel loose — not broken, just cheap. Your customer's customer notices it. That's the failure mode.
The other common failure is fastener loosening under cyclic load. A push back mechanism sees thousands of lean-back cycles over its service life. Fasteners that weren't torqued correctly, or were run in without thread engagement checks, will back out. The mechanism doesn't fail catastrophically — it just gets progressively sloppier until someone complains.
Both failure modes are installation problems, not mechanism problems. The fix is upstream.
Pre-installation checks: what to verify before you touch a fastener
Don't start assembly until you've confirmed three things on the seat pan:
1. Mounting surface flatness The mechanism's base plate needs full contact with the seat pan. Measure flatness across the four mounting hole positions. Acceptable deviation is typically under 0.5mm across the plate footprint. If your seat pan has a warp or a stamping burr at the hole locations, the mechanism will rock on the high point and the fasteners will be doing work they shouldn't.
(We see this most often with seat pans that have been stacked and stored under load — the material takes a set. Check every batch, not just the first piece.)
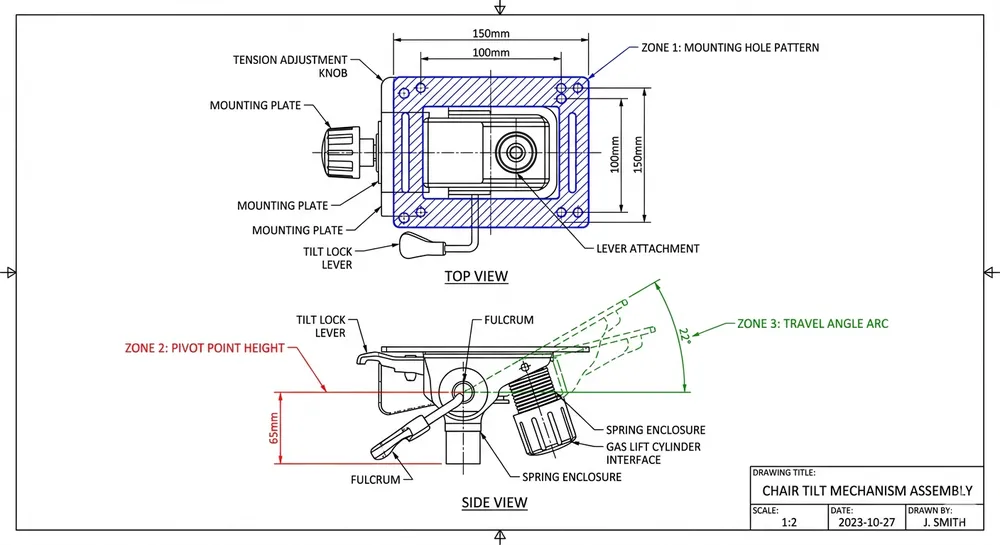
2. Hole position and diameter Verify that the mounting hole pattern matches the mechanism's base plate exactly. A 1mm positional error across a 4-hole pattern forces the mechanism into a canted position before the first fastener is tightened. Check hole diameter against the fastener spec — oversized holes allow the mechanism to shift under load even with correct torque.
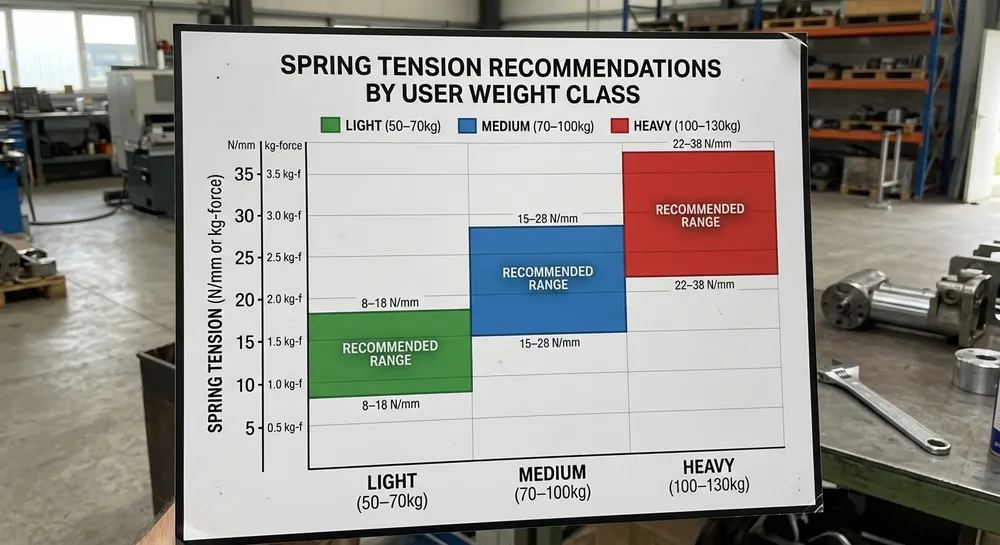
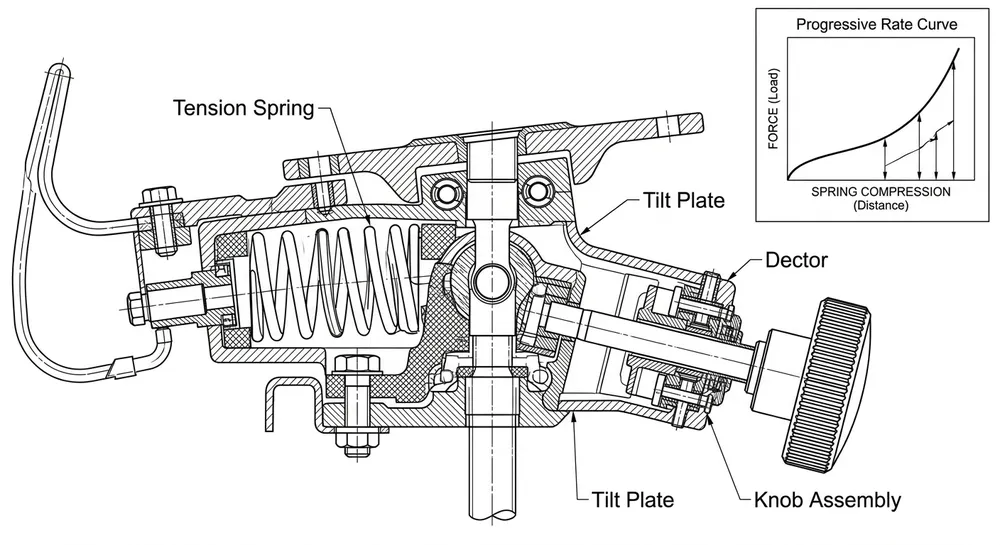
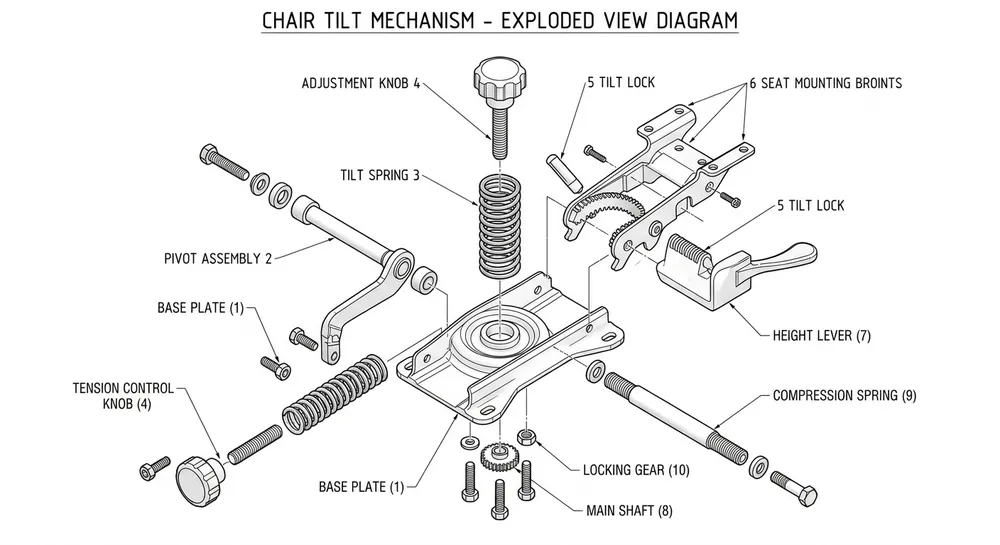
3. Thread condition on the mechanism's adjustment hardware Before mounting, cycle the spring tension adjuster through its full range by hand. It should move smoothly with no binding. If it's stiff or catches, the mechanism has a pre-existing issue — don't install it and expect the problem to resolve itself under load.
The mounting sequence that prevents misalignment
Order matters here. Running fasteners in randomly is the single most common cause of base plate distortion during installation.
Step 1 — Hand-start all fasteners before torquing any
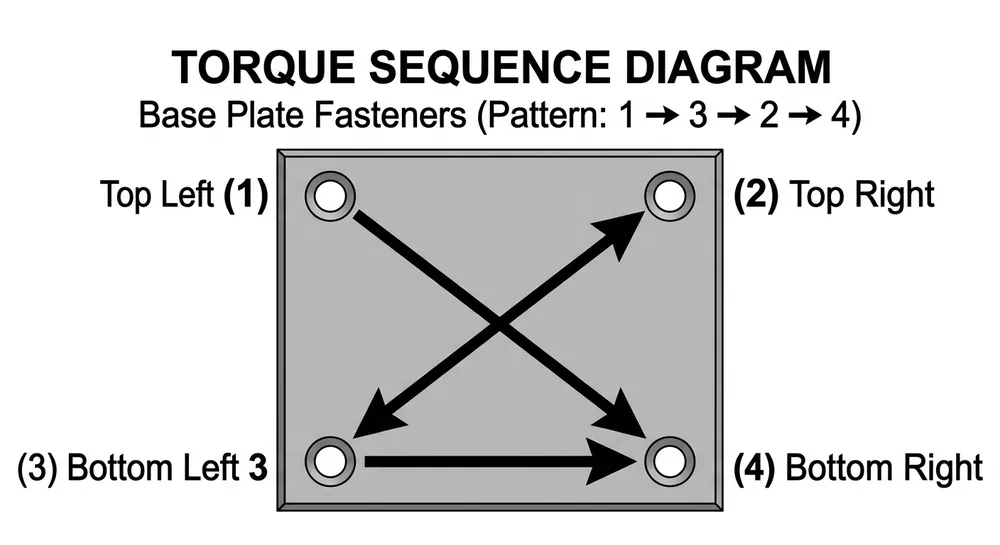
Place the mechanism on the seat pan and hand-thread all four fasteners until finger-tight. This lets the plate find its natural seating position. If you torque one corner first, you pull that corner down and introduce a twist into the plate before the others are engaged.
Step 2 — Cross-pattern torque in two passes
First pass: 30–40% of final torque, diagonal sequence (front-left → rear-right → front-right → rear-left). Second pass: full specified torque, same sequence. For M8 fasteners into steel seat pans, final torque is typically 20–25 Nm. For M6, 10–12 Nm. Check your mechanism's spec sheet — these values vary by base plate thickness and thread engagement depth.
Step 3 — Check pivot shaft perpendicularity before loading
After mounting, sight down the pivot shaft axis. It should be perpendicular to the seat pan's front edge within about 1°. A visible cant at this stage means the mounting surface wasn't flat or the hole pattern was off. Correct it now — you cannot torque your way out of a misaligned pivot.
Step 4 — Attach the backrest bracket with the mechanism in neutral position
The backrest bracket connects to the mechanism's rear arm. Make this connection with the mechanism sitting in its neutral (upright) position, not mid-travel. If you attach the backrest bracket while the mechanism is partially reclined, you build pre-tension into the connection that will either pull the back forward at rest or restrict full travel range.
Step 5 — Cycle the mechanism 5–10 times before final check
After full assembly, cycle the mechanism through its complete travel range 5–10 times under light hand pressure. This seats the pivot interfaces and lets any minor fastener relaxation occur before you do your final torque verification. Re-check torque on all fasteners after cycling.
Alignment verification: the checks that catch problems before the chair ships
Three checks, done in sequence:
Lateral symmetry check With the mechanism in neutral position, measure from the seat pan's centerline to the left and right edges of the backrest bracket attachment points. These should be equal within 2mm. An asymmetric reading means the backrest bracket is canted — it will pull the back off-center under load.
Travel arc check Push the seat back through its full travel range and observe the arc. The seat and back should move together in a smooth, consistent arc with no lateral drift. Any side-to-side movement during travel indicates pivot misalignment. Don't ship it.
Return force check Release the mechanism from full recline and observe the return. It should return to neutral smoothly under spring tension alone, without hesitation or a two-stage return. A hesitation mid-travel usually means the pivot is binding — either from misalignment or from a burr on the pivot shaft that wasn't caught in pre-check.
Wear prevention: what the installation manual doesn't tell you
The pivot shaft and its bearing surface are the mechanism's wear point. How long they last depends partly on the mechanism's material spec, but also on what happens at installation.
Lubrication at assembly, not after The pivot shaft should be lightly lubricated before the mechanism is mounted — not after. Once the mechanism is installed and the seat pan is attached, you can't reach the pivot interface without disassembly. A dry pivot running under cyclic load will wear measurably faster than a lubricated one. Use a lithium-based grease or the lubricant specified by the mechanism supplier. Don't use WD-40 — it's a penetrant, not a lubricant, and it will wash out of the interface within weeks.
Don't overtorque the travel stop adjustment Push back mechanisms have a travel stop that limits recline angle. It's typically a bolt or cam that contacts a stop surface on the base plate. Overtightening this adjustment concentrates stress at the contact point and can deform the stop surface over time, causing the travel limit to creep. Set it to the specified angle and leave it.
Check the seat pan's underside for sharp edges at the mounting holes Stamped seat pans often have a slight burr on the underside at the hole perimeter. If the mechanism's base plate sits on that burr, the contact is on a line rather than a surface — the plate rocks under load and the fasteners see bending stress they weren't designed for. Deburr the hole perimeter before mounting. It takes thirty seconds and it's worth it.
(We switched our own base plate spec to include a chamfered edge around the mounting holes after seeing this failure mode in returned product from one of our North American accounts. The chamfer costs almost nothing in tooling but eliminates the burr contact problem entirely.)
Sourcing risk: where the problem starts before your assembly line
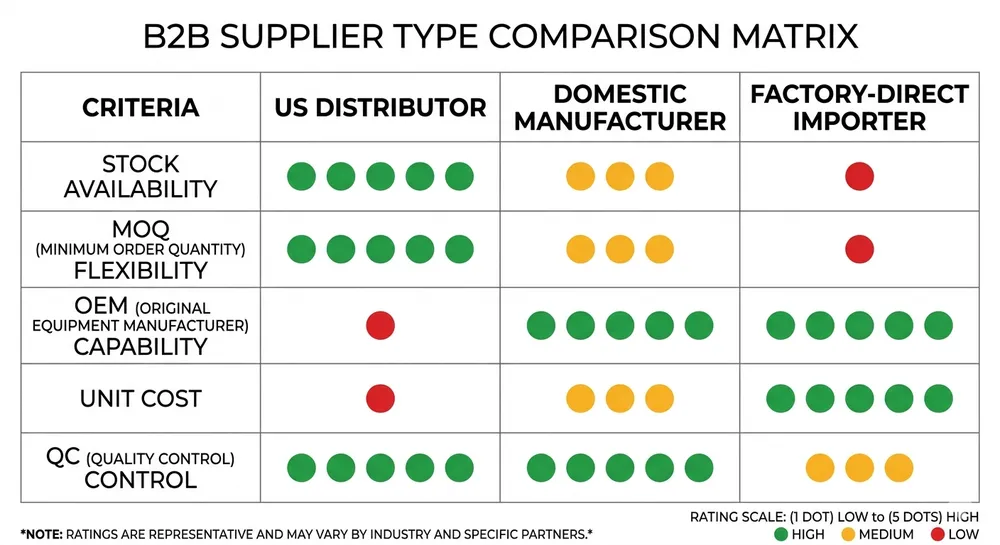
If you're sourcing push back mechanisms from multiple suppliers or switching suppliers between production runs, the installation problems above get harder to control — because the mechanism's dimensional spec may shift between batches.
The variables that matter most for installation consistency:
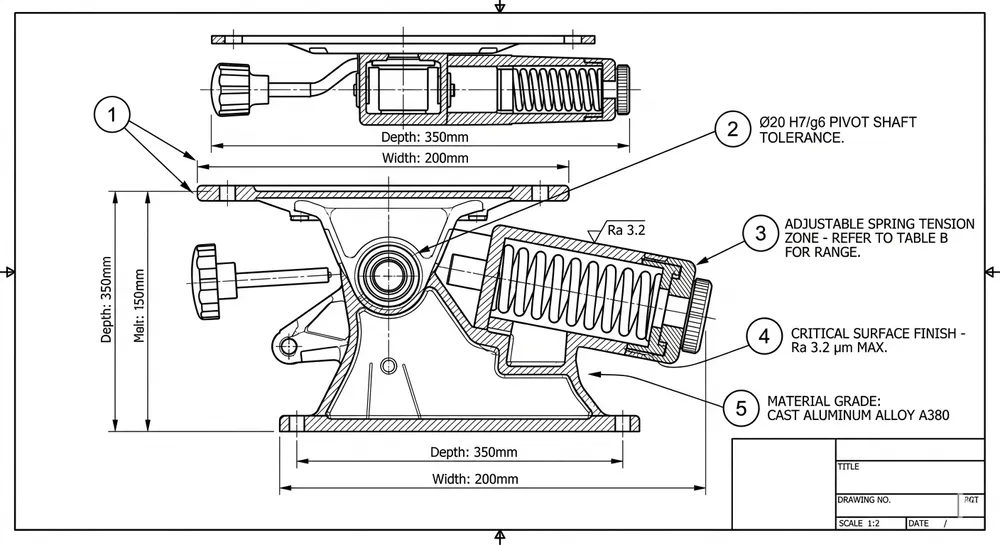
- Base plate hole pattern tolerance: ±0.3mm or tighter is workable. Looser than that and you're adjusting your assembly process to accommodate supplier variation.
- Pivot shaft diameter and surface finish: The shaft should be ground, not just turned. A turned shaft has a rougher surface that accelerates bearing wear. Ask your supplier which process they use.
- Spring tension consistency batch-to-batch: Push back mechanisms use a torsion spring or a coil spring depending on design. Spring rate variation between batches changes the return force and the feel of the mechanism. If your customer notices that chairs from one production run feel different from the last, spring rate drift is usually the cause.
- Travel stop position repeatability: If the travel stop is set at the factory, verify that it's consistent across units in the batch. A 3° variation in recline angle is noticeable to end users.
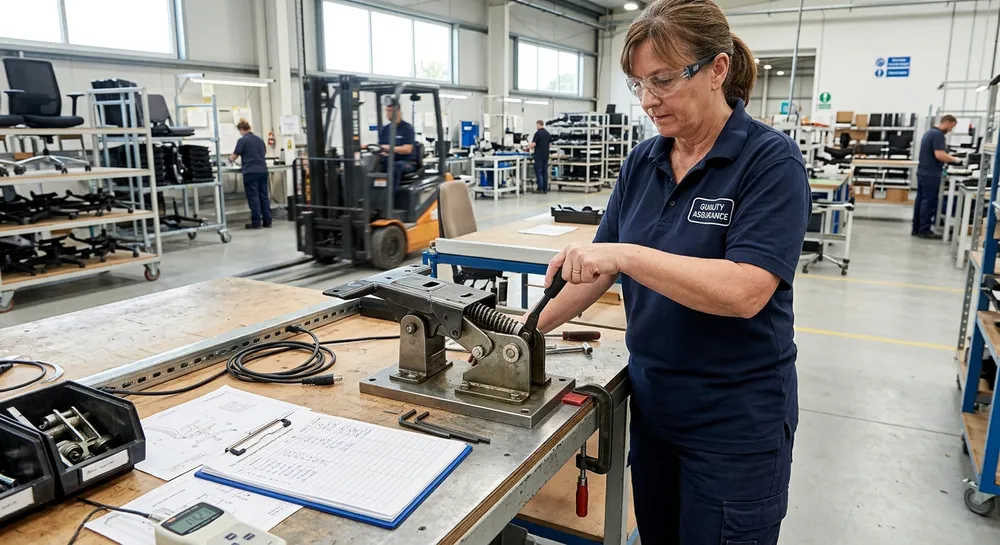
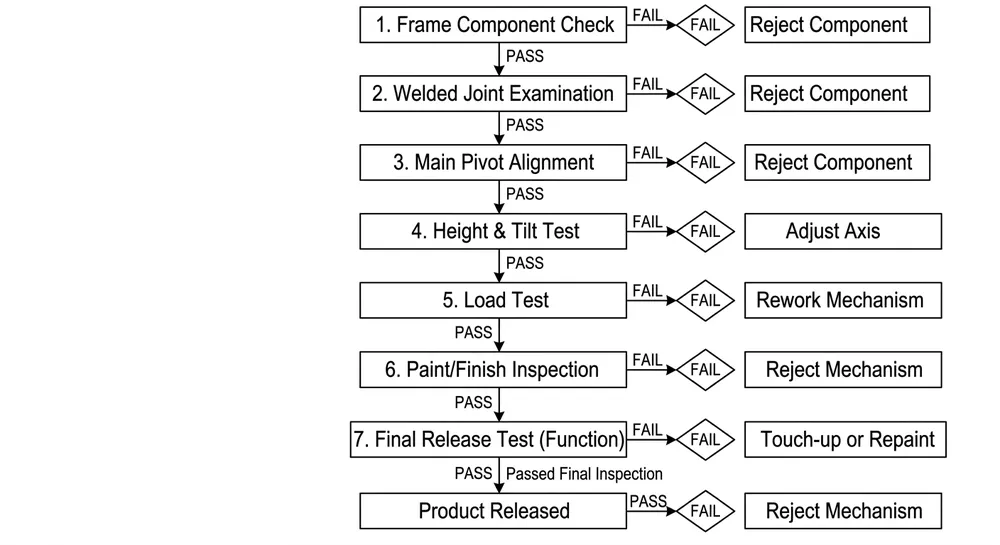
We run 100% functional testing on our Push Back Chair Mechanism before shipment — every unit cycles through its full travel range and the return force is checked against spec. Batch-to-batch spring rate variation is controlled through incoming inspection on spring stock. These aren't marketing claims; they're the checks that keep your assembly line from becoming a sorting operation.
If you're evaluating mechanism suppliers, ask specifically about their pivot shaft finishing process and their spring rate inspection protocol. A supplier who can answer those questions in detail is running a tighter process than one who can't.
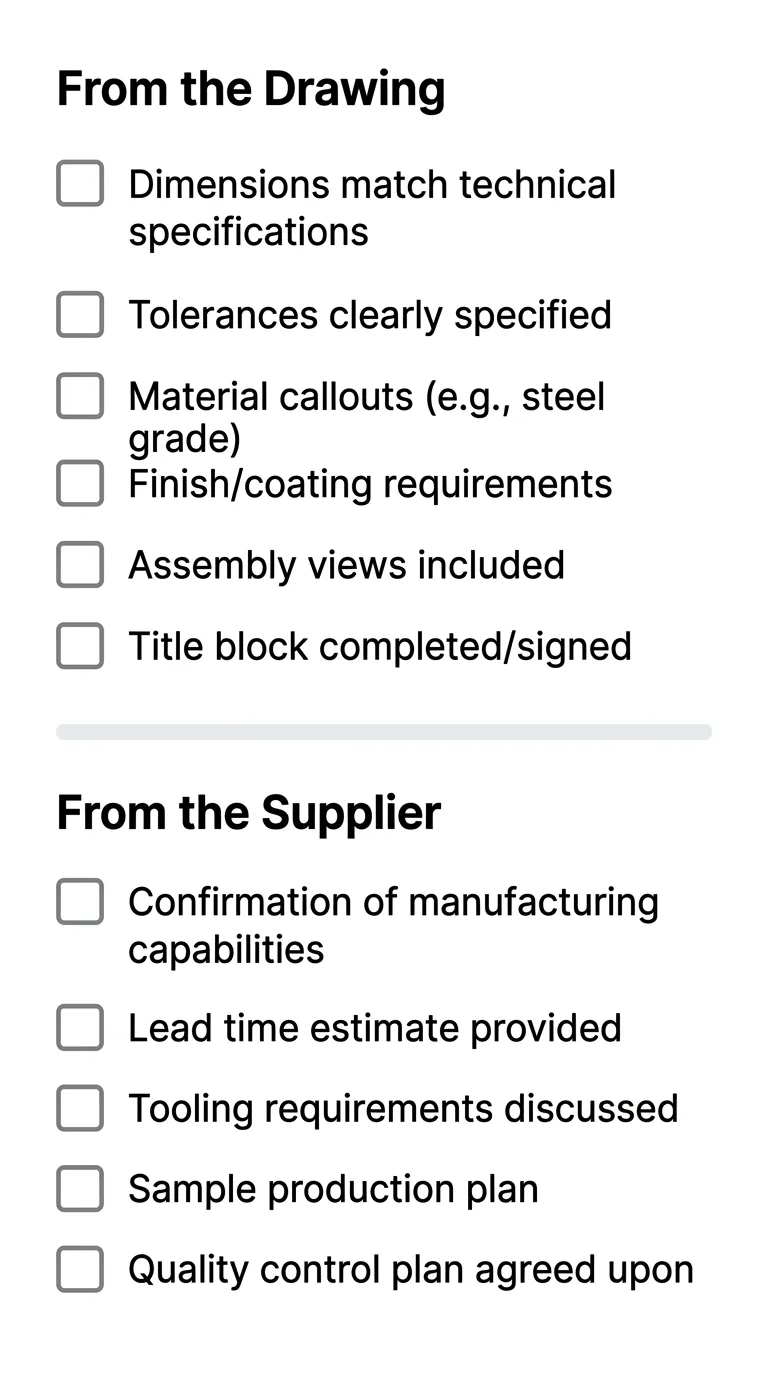
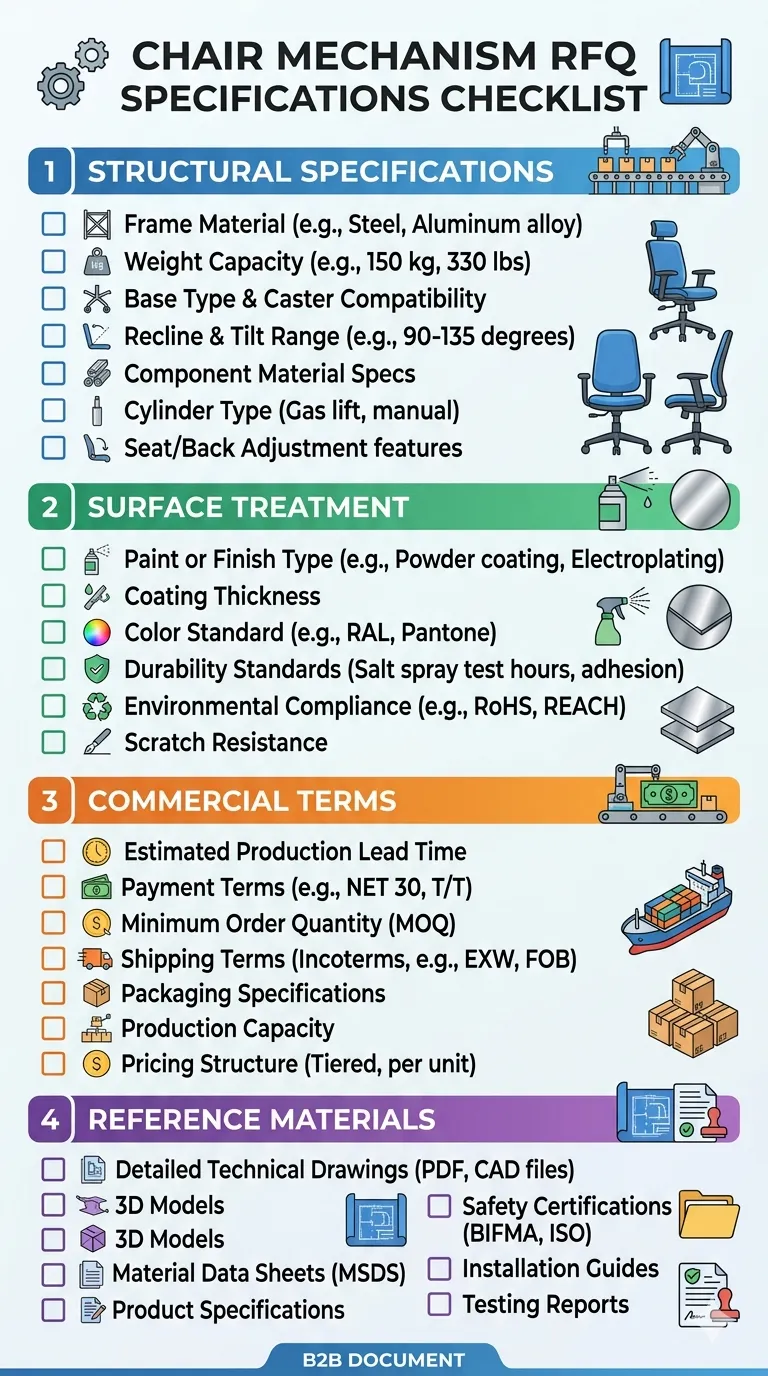
Installation checklist for production use
Print this and put it at the assembly station.
Pre-installation
- [ ] Seat pan mounting surface flatness verified (≤0.5mm deviation)
- [ ] Hole pattern position and diameter confirmed against mechanism spec
- [ ] Spring tension adjuster cycled by hand — smooth, no binding
- [ ] Pivot shaft lubricated before mounting
- [ ] Seat pan hole perimeter deburred
Mounting
- [ ] All fasteners hand-started before torquing
- [ ] First torque pass at 30–40% final torque, cross-pattern
- [ ] Final torque pass at specified value, cross-pattern
- [ ] Pivot shaft perpendicularity verified after mounting
Backrest attachment
- [ ] Mechanism in neutral (upright) position during backrest bracket attachment
- [ ] Backrest bracket fasteners torqued to spec
Post-assembly verification
- [ ] 5–10 manual cycles completed
- [ ] Fastener torque re-checked after cycling
- [ ] Lateral symmetry measured (≤2mm deviation)
- [ ] Travel arc observed — no lateral drift
- [ ] Return force check — smooth return, no hesitation
FAQ
What causes a push back chair mechanism to feel loose after a few months of use?
Almost always fastener loosening or pivot wear from a dry pivot interface. Fasteners under cyclic load back out if they weren't torqued correctly or if the base plate wasn't fully seated at installation. A dry pivot wears faster and develops lateral play. Both are installation-stage problems — correct torque sequence and pre-assembly lubrication prevent them.
Can I install a push back mechanism on a seat pan that wasn't designed for it?
You can adapt, but the hole pattern and surface flatness requirements still apply. If you're drilling new mounting holes, position them to match the mechanism's base plate exactly — don't rely on oversized holes and washers to compensate for positional error. The mechanism will shift under load. If the seat pan material is thinner than the mechanism's spec assumes, the thread engagement depth may be insufficient — use a nut plate on the underside rather than threading directly into thin material.
How do I know if a push back mechanism has a quality problem before I install it?
Three quick checks before mounting: (1) cycle the spring tension adjuster by hand — it should move smoothly through its full range; (2) check the pivot shaft for surface finish — it should feel smooth, not rough or gritty; (3) push the mechanism through its travel arc by hand — the motion should be consistent with no binding or dead spots. Any of these failing means the unit has a manufacturing issue. Don't install it and expect the problem to disappear.
What's the correct recline angle for a push back mechanism?
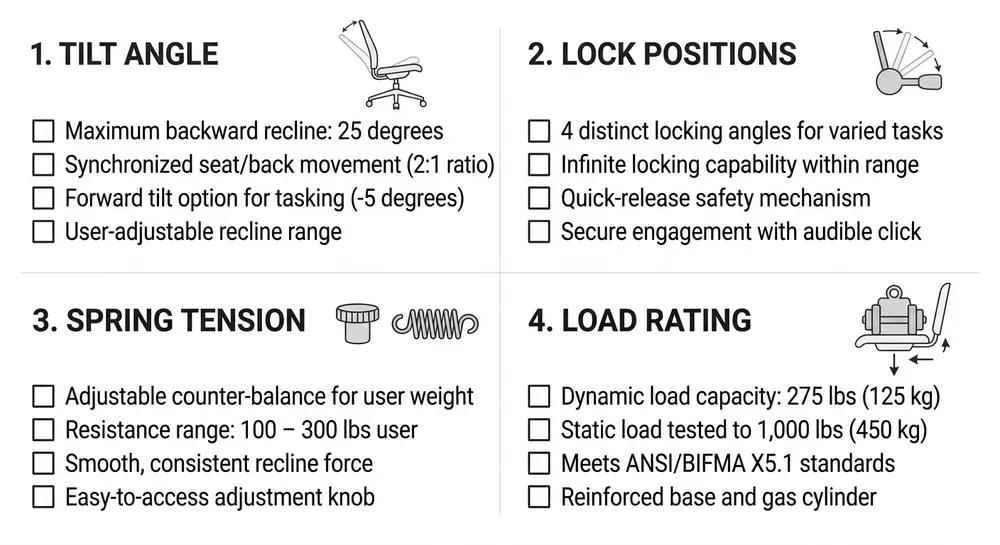
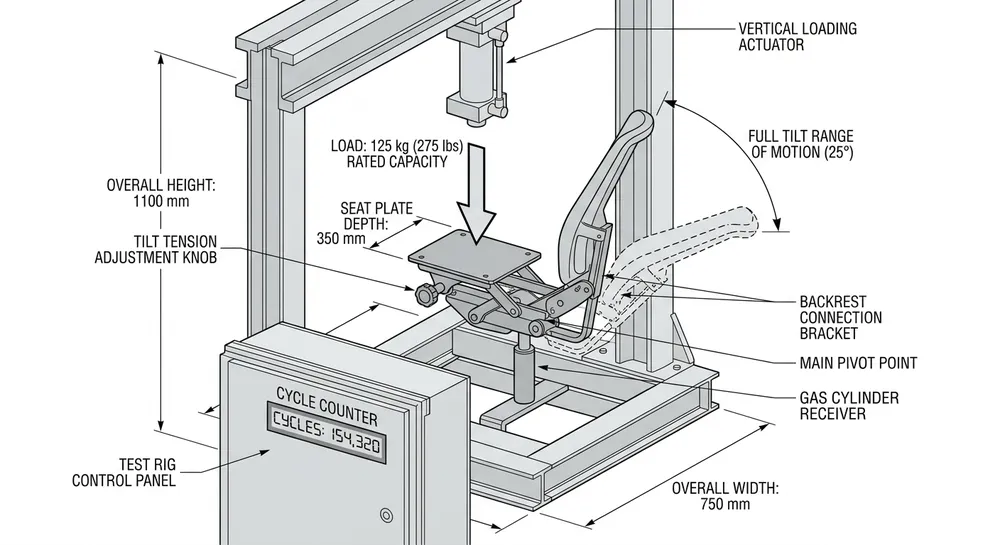
Standard push back mechanisms are typically set for 15–25° of recline from vertical. The right setting depends on the chair's intended use and your customer's spec. Ergonomic task chairs often target 18–22°. Lounge or casual seating can go to 25° or beyond. Set the travel stop at the specified angle and verify it's consistent across the batch — variation of more than 2–3° between units is noticeable.
—
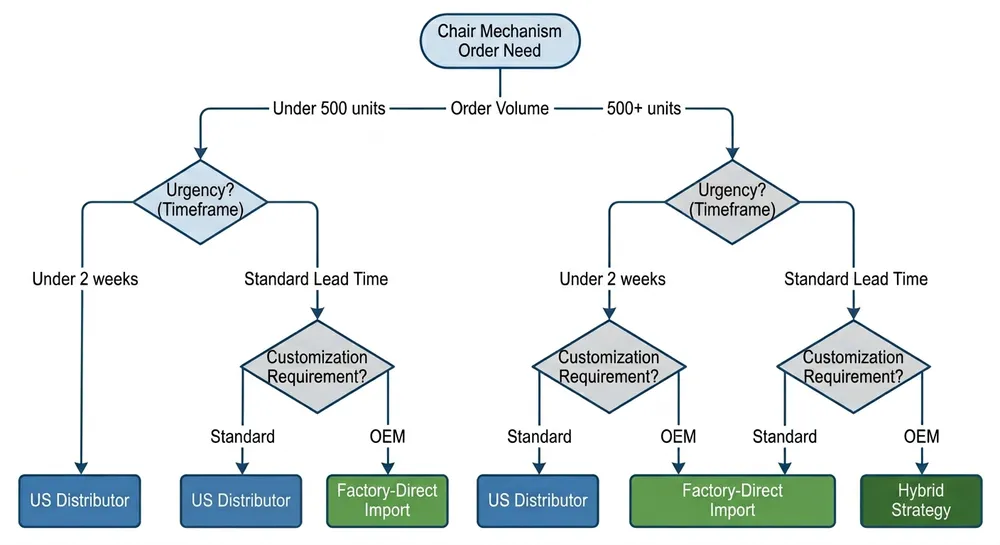
If you're specifying or sourcing push back mechanisms for a production run and want to confirm dimensional specs, spring rate tolerances, or batch consistency protocols, the Chair Mechanism product range is a good starting point. For specific volume requirements or OEM configurations, send us your specs and we'll come back with a detailed quote and, if useful, sample units for your assembly team to evaluate before committing to a batch.