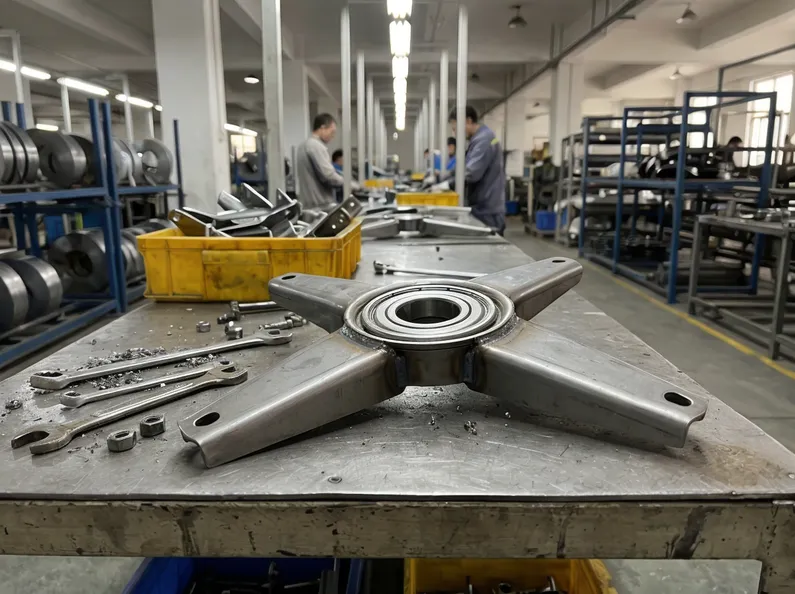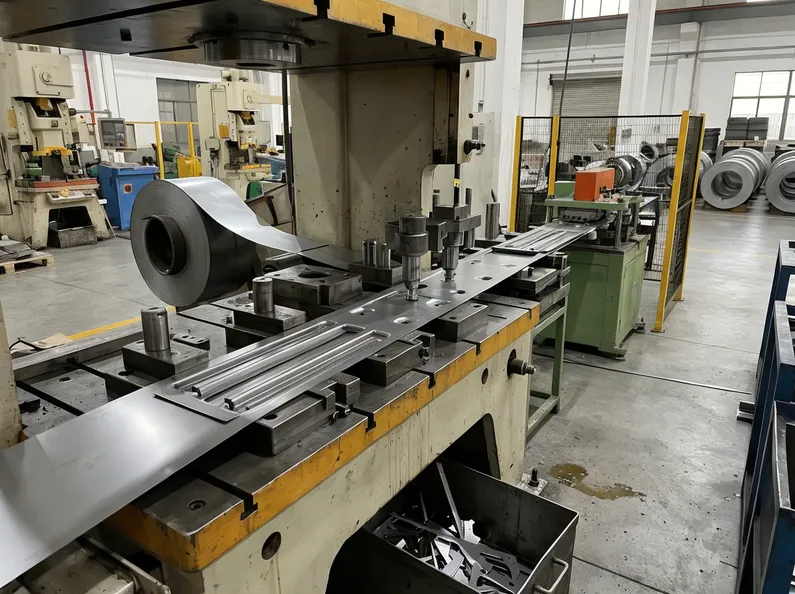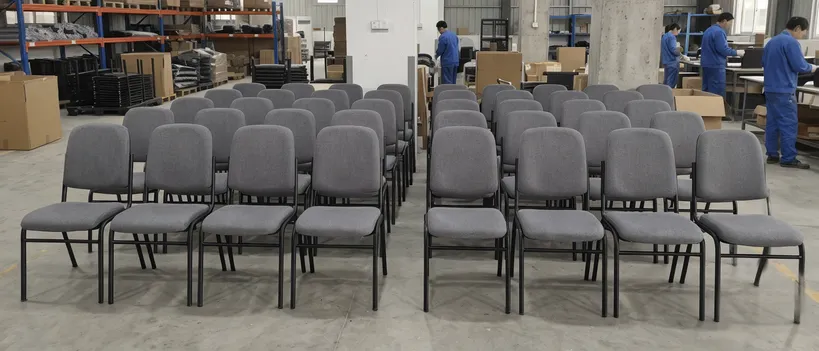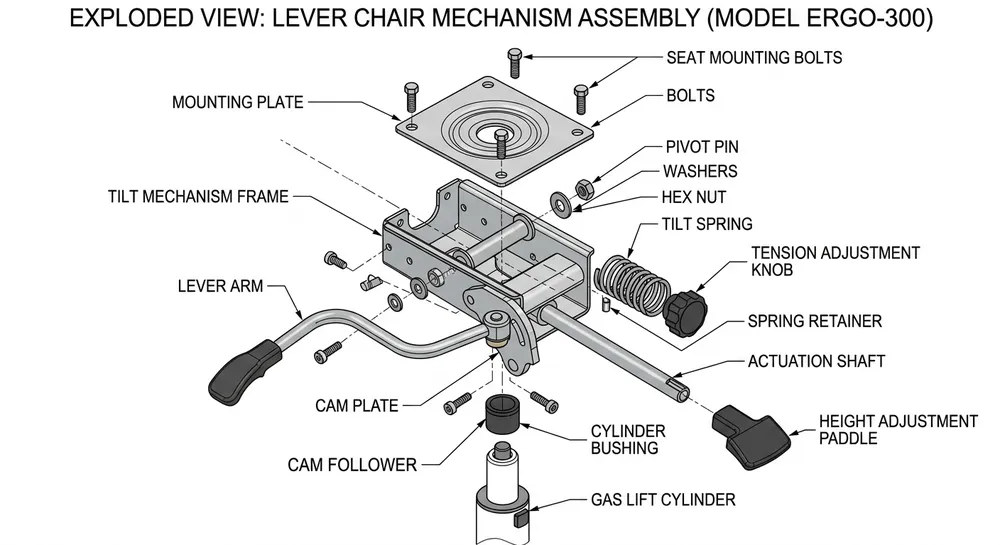
A lever chair mechanism that fails in the field costs more than the part itself. You're looking at warranty claims, return freight, replacement inventory, and — depending on your customer — a conversation about whether they'll reorder. We've seen all of it. The mechanisms that cause those problems almost always had detectable defects before they left the factory. The issue is knowing where to look.
This guide covers the failure modes we see most often in lever chair mechanisms, what causes them at the production level, and the inspection checkpoints that catch them before your container ships.

—
What a Lever Failure Actually Costs Your Business
Before getting into mechanisms, it's worth being direct about the commercial exposure.
A single field failure on a chair mechanism rarely stays isolated. If you're supplying a hospitality buyer with 500 chairs and three mechanisms fail within the warranty period, you're not replacing three units — you're fielding a quality audit, potentially replacing the full batch, and absorbing the freight both ways. For a distributor moving 2,000–5,000 units per season, one bad production run can wipe out the margin on the entire order.
The failure modes below are not edge cases. They're the ones that show up in warranty claims, customer photos, and return shipments. Most of them are preventable at the factory level — either through process control during production or through functional inspection before packing.
—
Failure Mode 1: Lever Engagement Slip Under Load
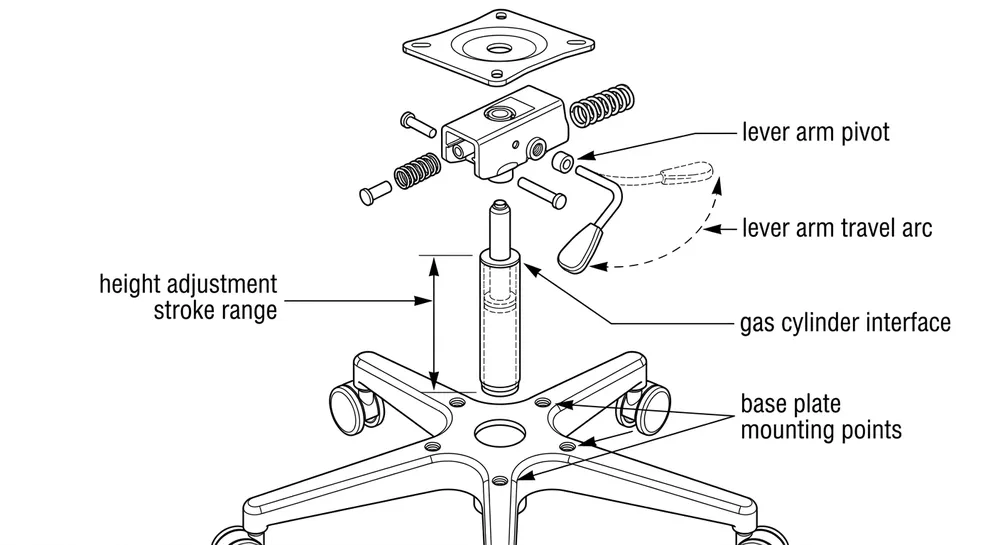
What it looks like: The height-adjustment lever engages when unloaded but releases or slips when the user sits down and applies body weight. The chair drops unexpectedly or won't hold the set height.
Why it happens: This is almost always a cam plate geometry issue or a worn/undersized detent spring. The cam plate controls how the lever locks into position — if the detent notch depth is shallow (typically anything under 0.8mm on standard commercial mechanisms), the spring force isn't enough to hold the lock under a seated load. We've also seen this caused by burrs on the cam surface from inadequate deburring after stamping, which prevents full detent engagement.
A secondary cause is incorrect spring rate. If a supplier substitutes a lighter spring to reduce cost — and it happens — the mechanism passes unloaded bench testing but fails under 80–100 kg of seated load.
Where it starts upstream: Cam plate dimensional tolerance is the root. If your supplier's stamping process runs loose on the detent notch depth, you'll get intermittent failures across a batch rather than consistent ones, which makes it harder to catch on sampling.
Inspection checkpoint:
- Apply 80 kg of downward load to the seat plate while engaging and releasing the lever 10 times
- The lock must hold without slip on every cycle
- Check detent notch depth on a sample of cam plates — spec should be confirmed with your supplier before production
—
Failure Mode 2: Lever Return Failure (Lever Doesn't Spring Back)
What it looks like: After the user releases the height lever, it stays in the depressed position instead of returning to neutral. The mechanism still functions, but the lever position is wrong and the user experience is poor — which generates complaints even when the chair technically works.
Why it happens: Return spring fatigue or incorrect spring installation. The return spring on a lever mechanism is a small torsion or compression spring, and it's one of the components most likely to be assembled incorrectly on a manual line. We've seen springs installed backwards, springs with the wrong free length, and springs that were simply left out on a small percentage of units during a high-speed assembly run.
(This is one of the reasons we moved lever mechanism assembly to semi-automated fixtures — manual assembly at volume has a measurable miss rate on small spring components, and it's hard to catch visually during in-process checks.)
Inspection checkpoint:
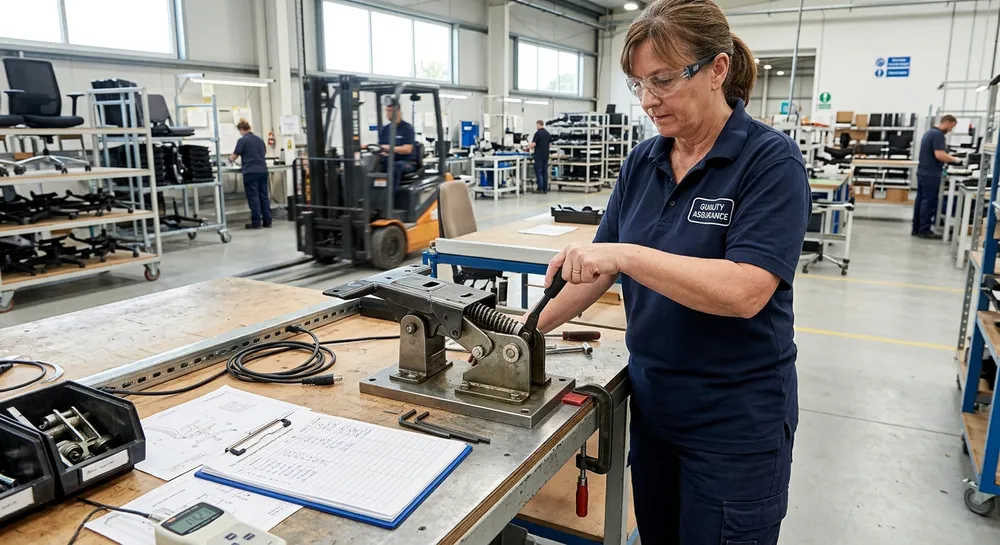
- Depress and release the lever 20 times in sequence
- The lever must return to neutral position within 0.5 seconds of release on every cycle
- Pull any unit where the lever return is sluggish — sluggish return today becomes no-return after 500 cycles in the field
—
Failure Mode 3: Mounting Plate Deformation Under Cycle Load
What it looks like: The mechanism functions correctly when new but develops play or wobble after 5,000–10,000 use cycles. The seat feels loose. In severe cases, the mounting holes elongate and the mechanism shifts position on the chair base.
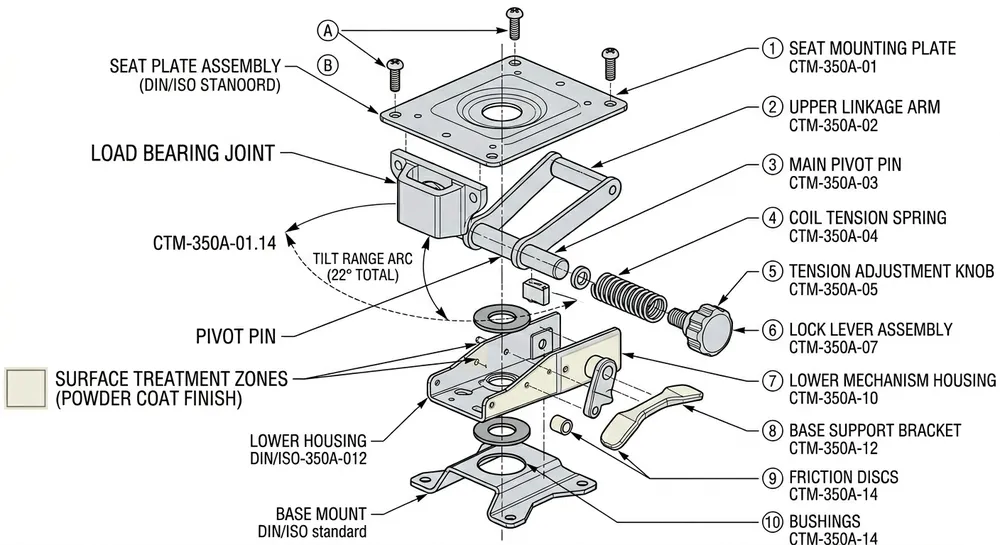
Why it happens: Undersized mounting plate thickness or incorrect steel grade. The mounting plate takes the full bending load every time the user shifts weight or reclines. On a standard commercial chair mechanism, the mounting plate should be cold-rolled steel at a minimum of 2.0mm for light-duty applications and 2.5mm for commercial or high-cycle environments. We've seen suppliers run 1.6mm plate to reduce material cost — it passes initial load testing but deforms progressively under real-world cycling.
The other cause is insufficient weld penetration on the bracket-to-plate joint. If the MIG weld on the pivot bracket is undersized or has porosity, the joint flexes under load and the plate deforms around the weld zone.
Where it starts upstream: This is a material specification and incoming inspection problem. If you're not confirming plate thickness and steel grade on incoming coil stock, you won't catch a substitution until the mechanisms are already assembled.
Inspection checkpoint:
- Measure mounting plate thickness on a sample of 5 units per production batch — use a calibrated micrometer, not visual inspection
- Run a 10,000-cycle load test on qualification samples before approving a new production run
- Inspect weld joints visually for undercut, porosity, or incomplete fusion at the bracket-to-plate interface
—
Failure Mode 4: Surface Corrosion on Plated Components
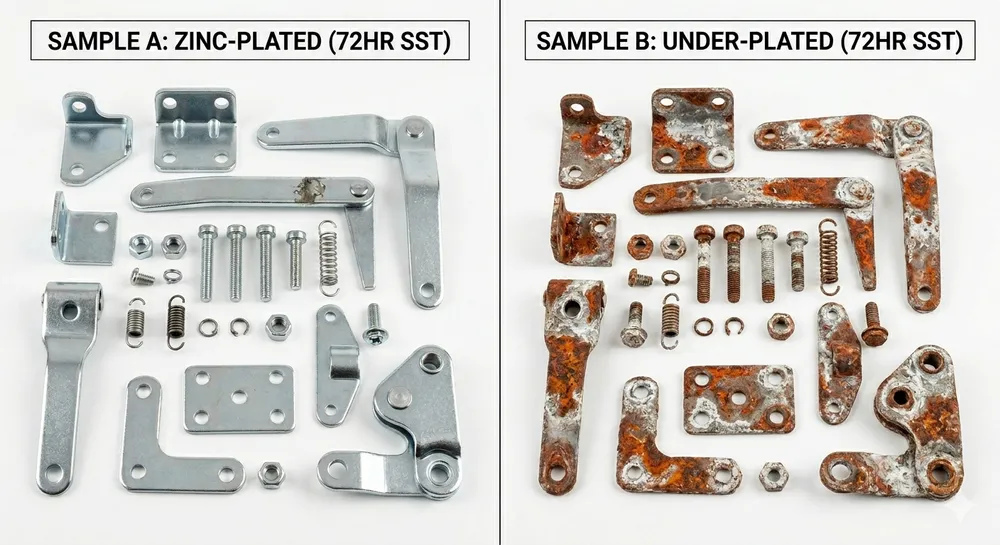
What it looks like: Rust spots or white oxidation appearing on the mechanism within 3–6 months of delivery, particularly on the lever arm, pivot pin, and spring components. This is a common warranty trigger for buyers supplying coastal markets or humid climates.
Why it happens: Inadequate plating thickness or incorrect passivation. Zinc plating on chair mechanism components should run at a minimum of 8–12μm for standard indoor environments. Below 8μm, the zinc sacrificial layer depletes quickly in humid conditions. We've also seen failures caused by hexavalent chromium passivation being replaced with trivalent without adjusting the process parameters — the corrosion resistance profile is different and requires process requalification.
A less obvious cause: mechanical damage to the plating during assembly. If components are tumbled or handled roughly after plating, micro-scratches in the zinc layer create corrosion initiation points that don't show up in a 48-hour salt spray test but appear in the field within months.
Inspection checkpoint:
- Request plating thickness reports from your supplier — zinc plating should be documented per batch, not just per product qualification
- Run a 96-hour neutral salt spray test (per ISO 9227) on samples from each production batch for coastal-market orders
- Inspect plated components for handling damage before assembly — scratches through to base metal are a rejection criterion
—
Failure Mode 5: Height Cylinder Collar Cracking or Splitting
What it looks like: The plastic or zinc alloy collar at the top of the gas cylinder connection cracks under load or splits at the seam. The chair loses height adjustment entirely and the mechanism becomes non-functional.
Why it happens: For zinc alloy die-cast collars, the most common cause is porosity in the casting — gas pockets in the die-cast part create stress concentration points that crack under repeated load cycling. Wall thickness below 2.5mm on structural sections of the collar is also a risk factor. For plastic collars, incorrect material grade (using general-purpose ABS where glass-filled nylon is specified) is the typical failure cause.
This is one of the failure modes where in-house die-casting control matters most. When the collar is sourced from a third-party foundry, you have no visibility into the casting parameters — injection pressure, mold temperature, cooling time — that determine whether porosity is present. We brought die-casting in-house specifically because collar and adjustment component failures were the leading source of quality complaints we couldn't control through incoming inspection alone.
Inspection checkpoint:
- Apply a 150 kg axial load to the cylinder collar for 60 seconds — no cracking or visible deformation is acceptable
- For die-cast collars, request X-ray or dye-penetrant inspection reports on qualification samples to check for internal porosity
- Confirm material specification in writing before production — "zinc alloy" is not a sufficient spec; ZA-8 or ZA-12 with documented composition is
—
Failure Mode 6: Tilt Lock Disengagement Under Lateral Load
What it looks like: The tilt lock holds correctly under direct vertical load but releases when the user leans sideways or applies an off-axis force. The chair tilts unexpectedly when the user reaches to the side.
Why it happens: Tilt lock geometry that's optimized for axial load only. The lock pawl engagement depth and the angle of the locking face determine how well the mechanism resists off-axis forces. A pawl engagement depth under 1.5mm on the locking face is typically insufficient for commercial use. We've also seen this caused by incorrect spring preload on the lock pawl — if the spring is too light, lateral force is enough to cam the pawl out of engagement.
Inspection checkpoint:
- Test tilt lock with a 30° off-axis lateral load of 50 kg applied to the seat plate
- The lock must not disengage under this load
- Check pawl engagement depth on a sample — measure with a depth gauge, not visual estimation
—
The Pre-Shipment Inspection Sequence That Catches All Six
Running individual checks for each failure mode is useful during qualification. For production batches, you need a consolidated sequence that covers all six without adding excessive time per unit.
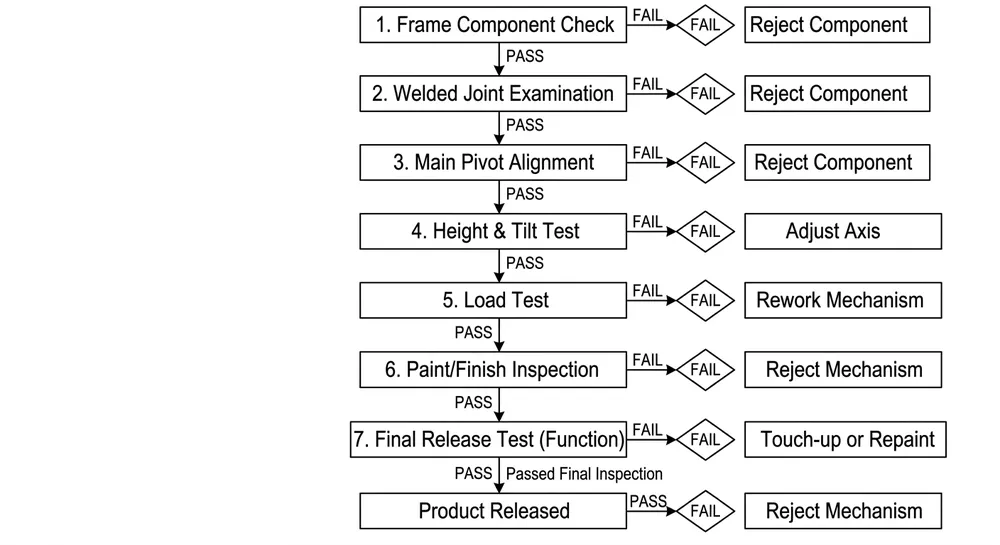
Here's the sequence we run on every batch before packing:
| Step | Check | Pass Criterion |
|---|---|---|
| 1 | Lever engagement under 80 kg load — 10 cycles | No slip on any cycle |
| 2 | Lever return — 20 cycles | Return to neutral within 0.5 sec |
| 3 | Mounting plate thickness — micrometer sample | ≥ 2.0mm (light duty) / ≥ 2.5mm (commercial) |
| 4 | Plating visual — handling damage check | No scratches through to base metal |
| 5 | Cylinder collar axial load — 150 kg / 60 sec | No cracking or deformation |
| 6 | Tilt lock lateral load — 50 kg at 30° | No disengagement |
| 7 | Full cycle function — 50 actuations | Smooth operation, no binding |
Steps 1, 2, 5, and 6 run on 100% of units. Steps 3 and 4 run on a sample of 5 units per 500-unit production batch. Step 7 runs on 100% of units as the final functional gate before packing.
(The 100% functional testing requirement is non-negotiable for us. Sampling-based final inspection on mechanisms misses the intermittent failures — the ones that pass 9 out of 10 times and fail on the 10th. Those are exactly the units that generate warranty claims.)
—
Where the Problem Usually Starts: Upstream Specification Gaps
Most of the failure modes above have a common upstream cause: the buyer never locked the specification tightly enough before production started.
"Zinc alloy collar" is not a specification. "ZA-8 die-cast collar, minimum wall thickness 2.5mm, 150 kg axial load test required" is a specification. The difference between those two statements is the difference between a supplier who can substitute freely and one who can't.
The same applies to steel plate thickness, spring rate, plating thickness, and cam plate geometry. If your purchase order doesn't specify these parameters, your supplier will optimize for cost within whatever tolerance they can get away with. That's not malicious — it's how manufacturing economics work.
Before placing a production order for any chair mechanism, confirm the following in writing:
- Mounting plate: thickness (mm) and steel grade (SPCC or equivalent)
- Cam plate: detent notch depth (mm) and surface finish requirement
- Plating: zinc plating thickness (μm), passivation type (trivalent chromium), and salt spray test duration
- Die-cast components: alloy grade, minimum wall thickness, and porosity inspection method
- Springs: free length, wire diameter, and spring rate (N/mm)
- Load test requirements: seated load (kg), cycle count, and off-axis test parameters
Getting these on paper before production starts costs nothing. Getting them after a batch fails costs the margin on the order.
—
Sourcing Levers from a Factory That Controls the Failure Points
The inspection sequence above works. But inspection is a filter, not a fix — it catches defects after they're made. The more reliable approach is sourcing from a factory where the process controls prevent the defects from occurring in the first place.
The failure modes in this article cluster around three production variables: stamping dimensional control, die-casting quality, and surface treatment consistency. At MVMHardware, all three are in-house processes. Our stamping presses hold ±0.15mm on cam plate geometry. Die-casting for collars and adjustment components runs on our own equipment with documented process parameters. The plating line runs zinc at 8–12μm with trivalent chromium passivation, and we pull salt spray samples on every coating run.
We run 100% functional testing on every unit before packing — not sampling. The seven-step sequence above is what we actually run, not a theoretical checklist.
If you're currently sourcing lever mechanisms and seeing field failures, or if you're qualifying a new supplier and want to understand what process documentation to request, send us your requirements. We'll review your current spec and tell you where the gaps are — whether you end up sourcing from us or not.
—
Frequently Asked Questions
What is the most common cause of lever chair mechanism failure in commercial environments?
Lever engagement slip under load is the most frequent field failure we see. It traces back to cam plate detent geometry — specifically, notch depth that's within tolerance for unloaded testing but insufficient to hold under 80–100 kg of seated load. The fix is tightening the cam plate dimensional spec and running loaded functional tests, not just bench tests.
How do I specify zinc plating thickness for chair mechanisms going to coastal markets?
For coastal or high-humidity markets, specify a minimum of 12μm zinc plating with trivalent chromium passivation, and require a 96-hour neutral salt spray test (ISO 9227) on batch samples. Standard indoor-market specs at 8μm will show corrosion within 6–12 months in coastal environments.
What's the minimum cycle count I should require for commercial chair mechanism qualification?
50,000 cycles is the standard floor for commercial office chair certification in most markets. For high-use environments — hospitality, healthcare, education — specify 80,000–100,000 cycles. Ask your supplier for the actual test report, not just a claim.
How do I tell if a die-cast collar has internal porosity without destructive testing?
Dye-penetrant inspection (DPI) is the practical non-destructive method for surface-connected porosity. For internal porosity, X-ray inspection on qualification samples is the standard approach. For production batches, the practical control is process documentation from the foundry — injection pressure, mold temperature, and cooling time records — combined with a destructive cross-section on one unit per batch.